The Geenee WebAR Builder lets you create augmented reality experiences in a matter of minutes, simply by dragging and dropping 3D assets directly into the browser. With no code at all, you can quickly build an AR scene and share it far and wide. However, with the addition of just a little code, you can take your Geenee creation to a whole new level, adding a layer of interactivity and making it far more engaging for the end-user.
Below we’ve detailed three of our favorite code snippets along with short videos explaining exactly how to implement them into your next Geenee campaign. Take a look:
1. Create a 3D Diorama
As shown above, this effect is great for creating an AR scene that adheres to the inside of a box, making the interior seemingly come to life in AR. For instance, a toy company looking to show the possibility of interactive play, or a packaged goods brand that wants to show an animated AR product tutorial.
To create a 3D diorama:
- For more information on how to optimize your 3D assets for Geenee, check out some documentation HERE.
- Once signed into the builder, choose AR Type > Marker AR > Add Model > Apply Occluder to the 1 element (mesh)
- Insert this code on the “Model” level inside the 3D Viewer.
hiddenMesh – object’s name of previously created Mesh in your 3d Editor.
const hiddenMesh = this.activeSceneModel.scene.getObjectByName('hiddenMesh');

hiddenMesh.material.colorWrite = false;
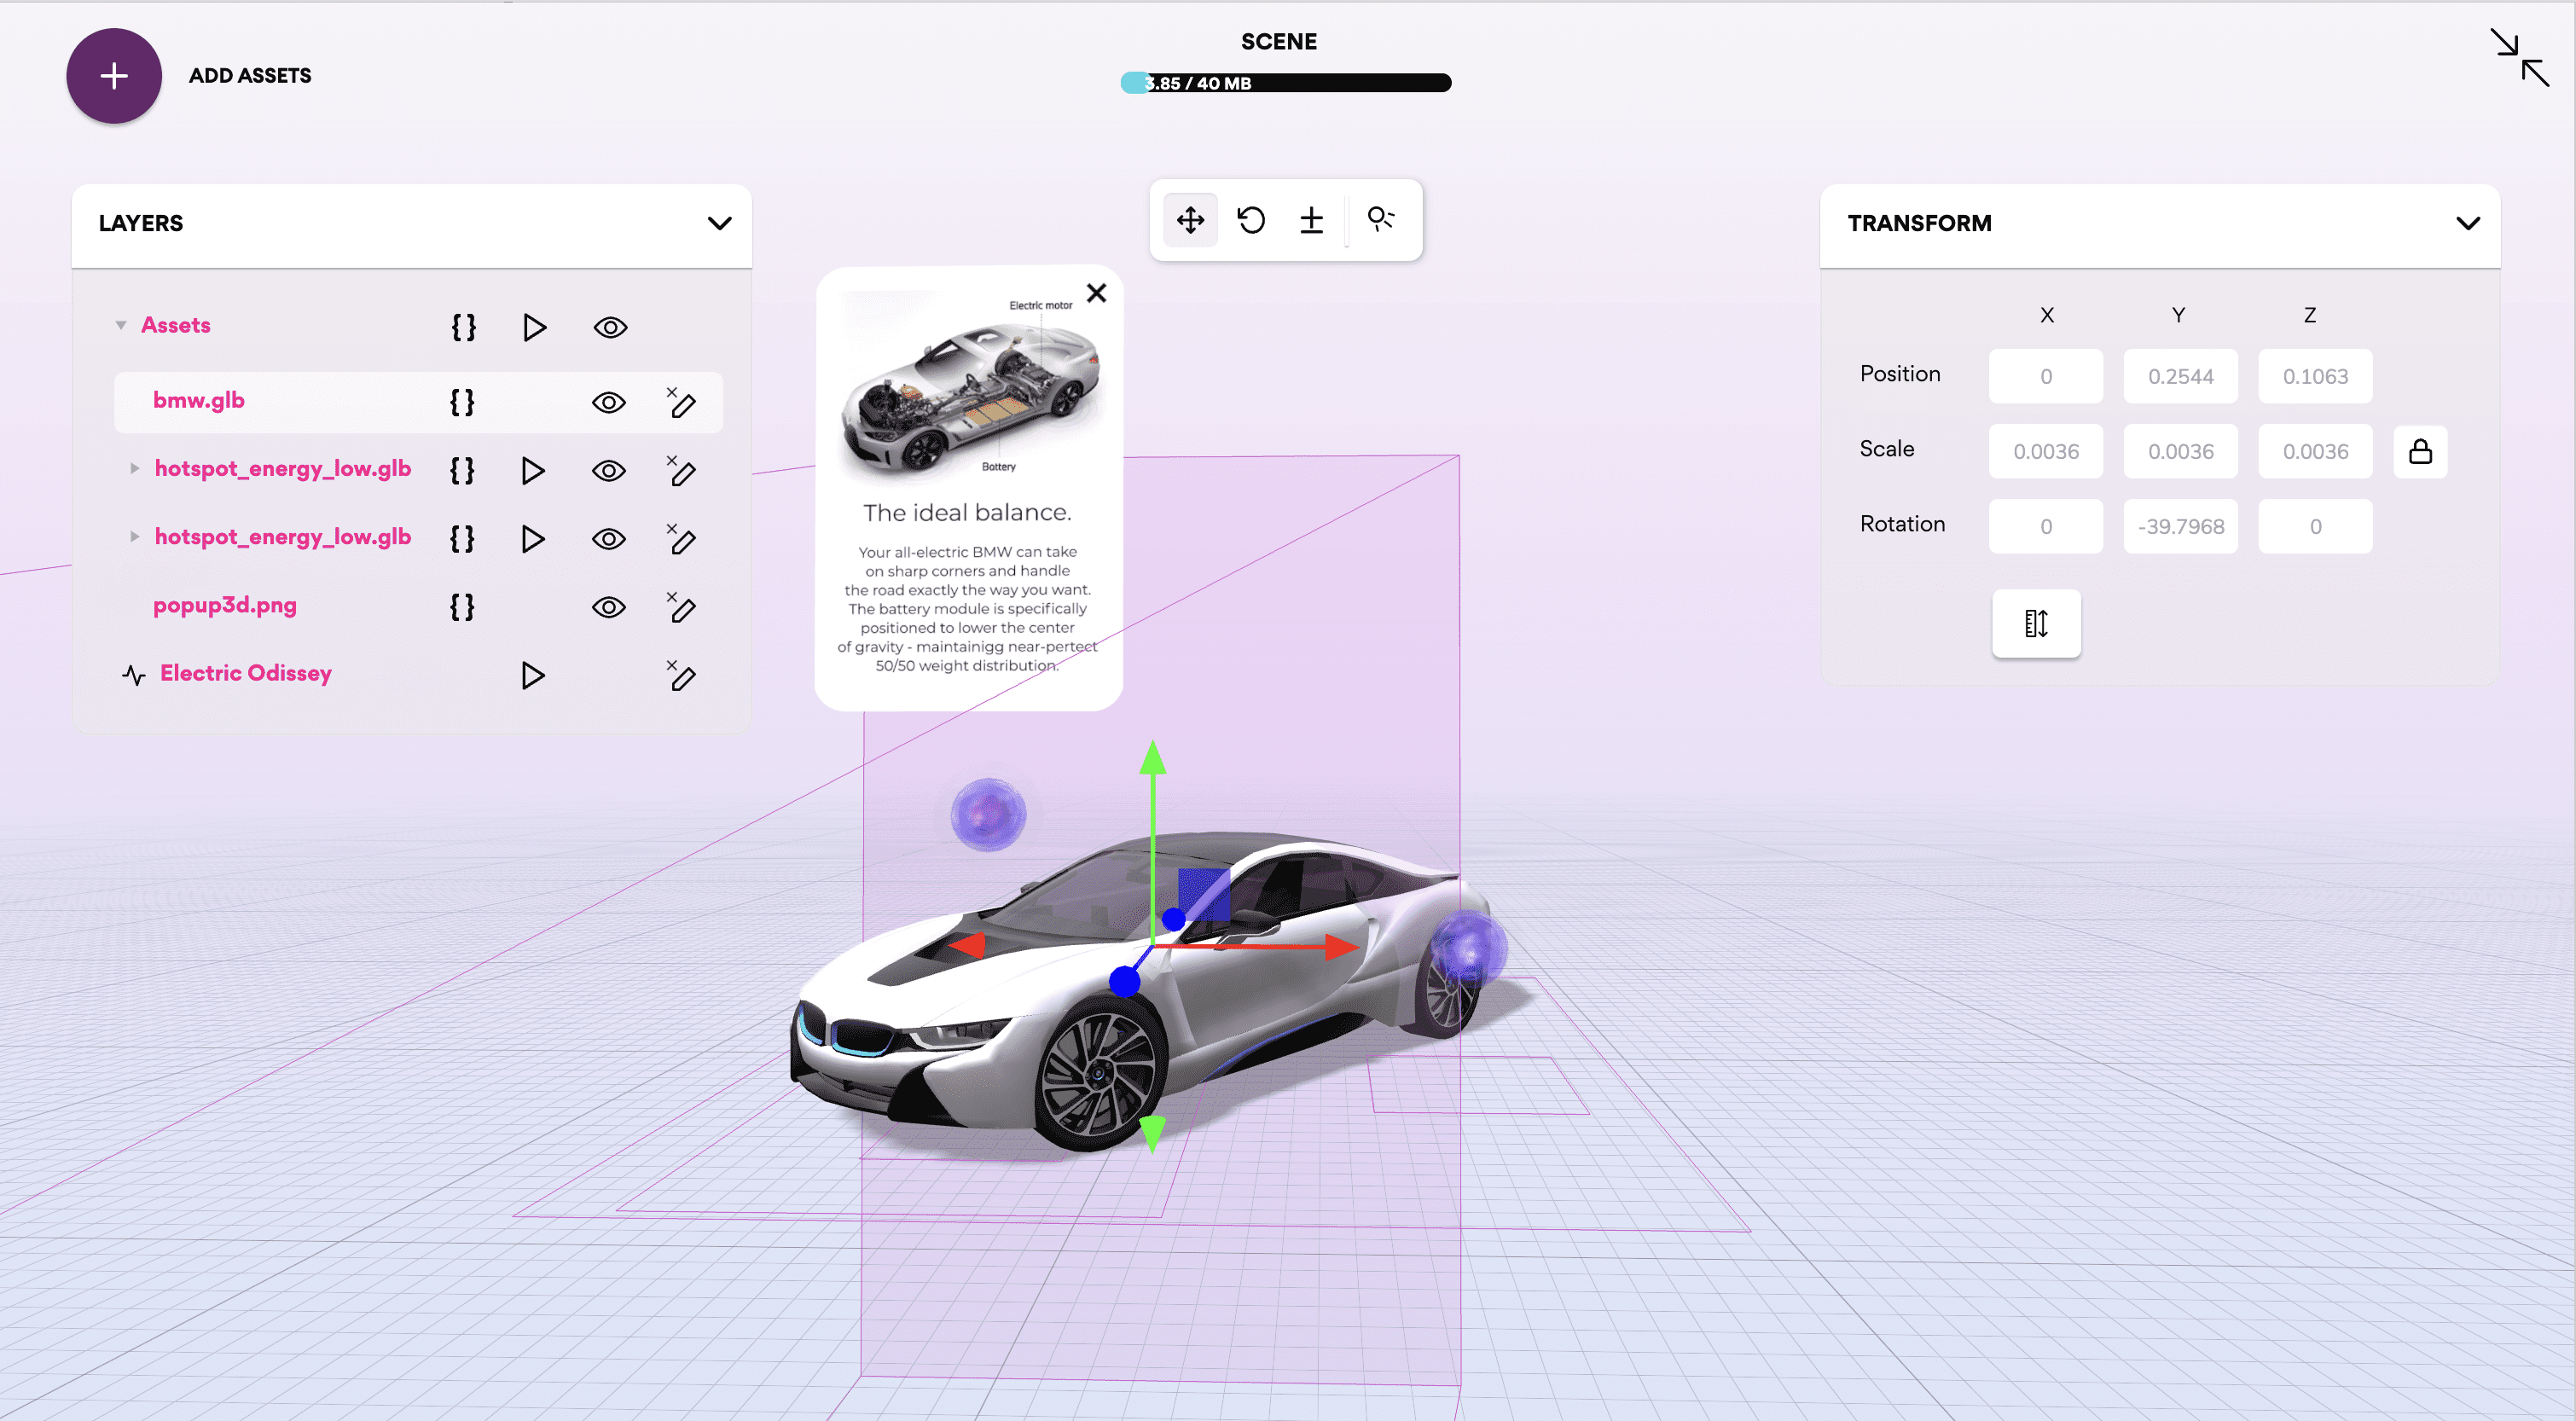
2. Apply interactive content hotspots
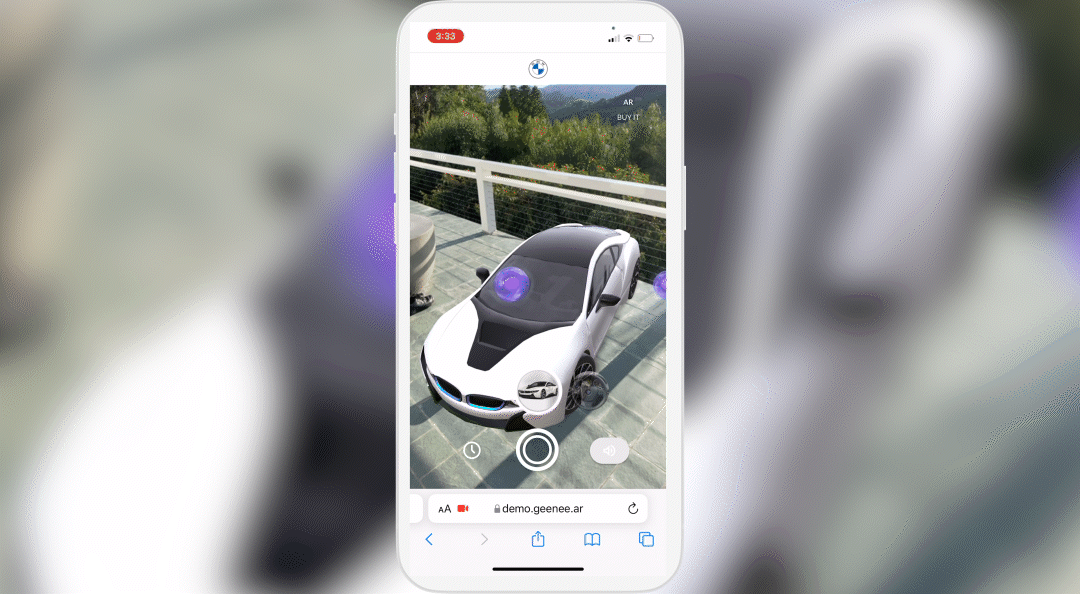
This is a great way to add useful content to an AR scene. Let the end-user hone in on specific areas of your 3D model and tap on a content hotspot to learn more information.
To create an interactive hotspot:
- Add your first child to a 3D scene, open Full-screen Viewer, and click on “{}” to open Custom Code Editor
- Create any 2D UI you want to open after clicking on your hotspot:
popupWrapper.addEventListener('click', () => {

const popupStyle = document.getElementById('hotspot-popup').style;

popupStyle.opacity = 0;

popupStyle.pointerEvents = 'none';

})
3. Add any element you want to act as a Hotspot into the 3D scene. It can be .glb / .jpeg / .png / .gif / .mp4
4. Open Full-screen Viewer and click on “{}” icon in your HOTSPOT object row. Add the following script below:
this.on('on-model-click', () => {

const popupStyle = document.getElementById('hotspot-popup').style;

popupStyle.opacity = 1;

popupStyle.pointerEvents = 'all';

})
3. Add a joystick to move your 3D asset around a scene
Looking to create an AR game? Step one is to add a joystick that lets the end-user control the movement of the 3D asset.
To let the end-user control your 3D asset with a joystick:
- Add your model to the 3D Scene.
- Open Custom Code Editor (press ”{}” icon) and insert the code below:
document.getElementById('geenee-joystick').style.display = 'block'

const object = this.object3D;

const matrix = this.activeSceneModel.getObjectByName('geenee-3d-matrix-target-group');

let run = false;

let joyX, joyY;

const joystick2 = this.activeSceneModel.joystick

const render = () => {

if (started) {

joyX = joystick2.value.x;

joyY = joystick2.value.y;

if (joyX || joyY) {

const dist = Math.max(Math.abs(joyX), Math.abs(joyY));

object.translateZ(dist / 2000);

object.rotation.y = Math.atan2(joyX, -joyY) - matrix.rotation.y;

if (!run) {

crossFade('Idle 01', 'Push 01', 0.5);

setTimeout(() => {

crossFade( 'Push 01', 'Ride 01', 0.5);

}, 2000);

run = true;

}

} else {

if (run) {

crossFade( 'Ride 01', 'Idle 01', 0.5);

run = false;

}

}

}

};

// Reassign to Geenee Render Loop

this.activeSceneModel.userCallbacks.onRender = render;

}
The tips shared above are just the beginning. There are countless ways to customize your Geenee project with code. On top of the three listed in this article, you can find more custom code snippets here
Sign up and start building today: