So your favorite PFP project just released the long-awaited 3D files. Now that you have access to your avatar, it’s time to make it interactive. Thanks to the Geenee AR Body Tracking SDK, you can become your avatar in web-based augmented reality, or turn your avatar into a digital dance partner.
The first step is to prepare the 3D files for the Geenee WebAR environment. Below is a step-by-step video tutorial showing exactly how to do it.
As a companion to the video, check out the time-stamped guide below pointing to each key piece of the asset preparation pipeline:
- Intro 0:00:00
- Prepare the model 0:00:30
Import glb 0:00:45
Remove previous skeleton 0:01:05
Apply Armature (cmd + a) 0:02:12
Remove parent 0:03:25
- Textures optimization: 0:04:00
Recommended less than 30MB (less than 10MB is better)
1k or 2k resolution
Export .gltf + .bin + textures 0:04:22
- Rescale and compressing with tiny.png 0:05:00
Rescale to 1k or 2k
Mac: Select all images (amd+a) -> open -> tools -> Adjust size -> 1024px -> close (autosaving)
tiny.png -> drag&drop -> download all -> replace with original
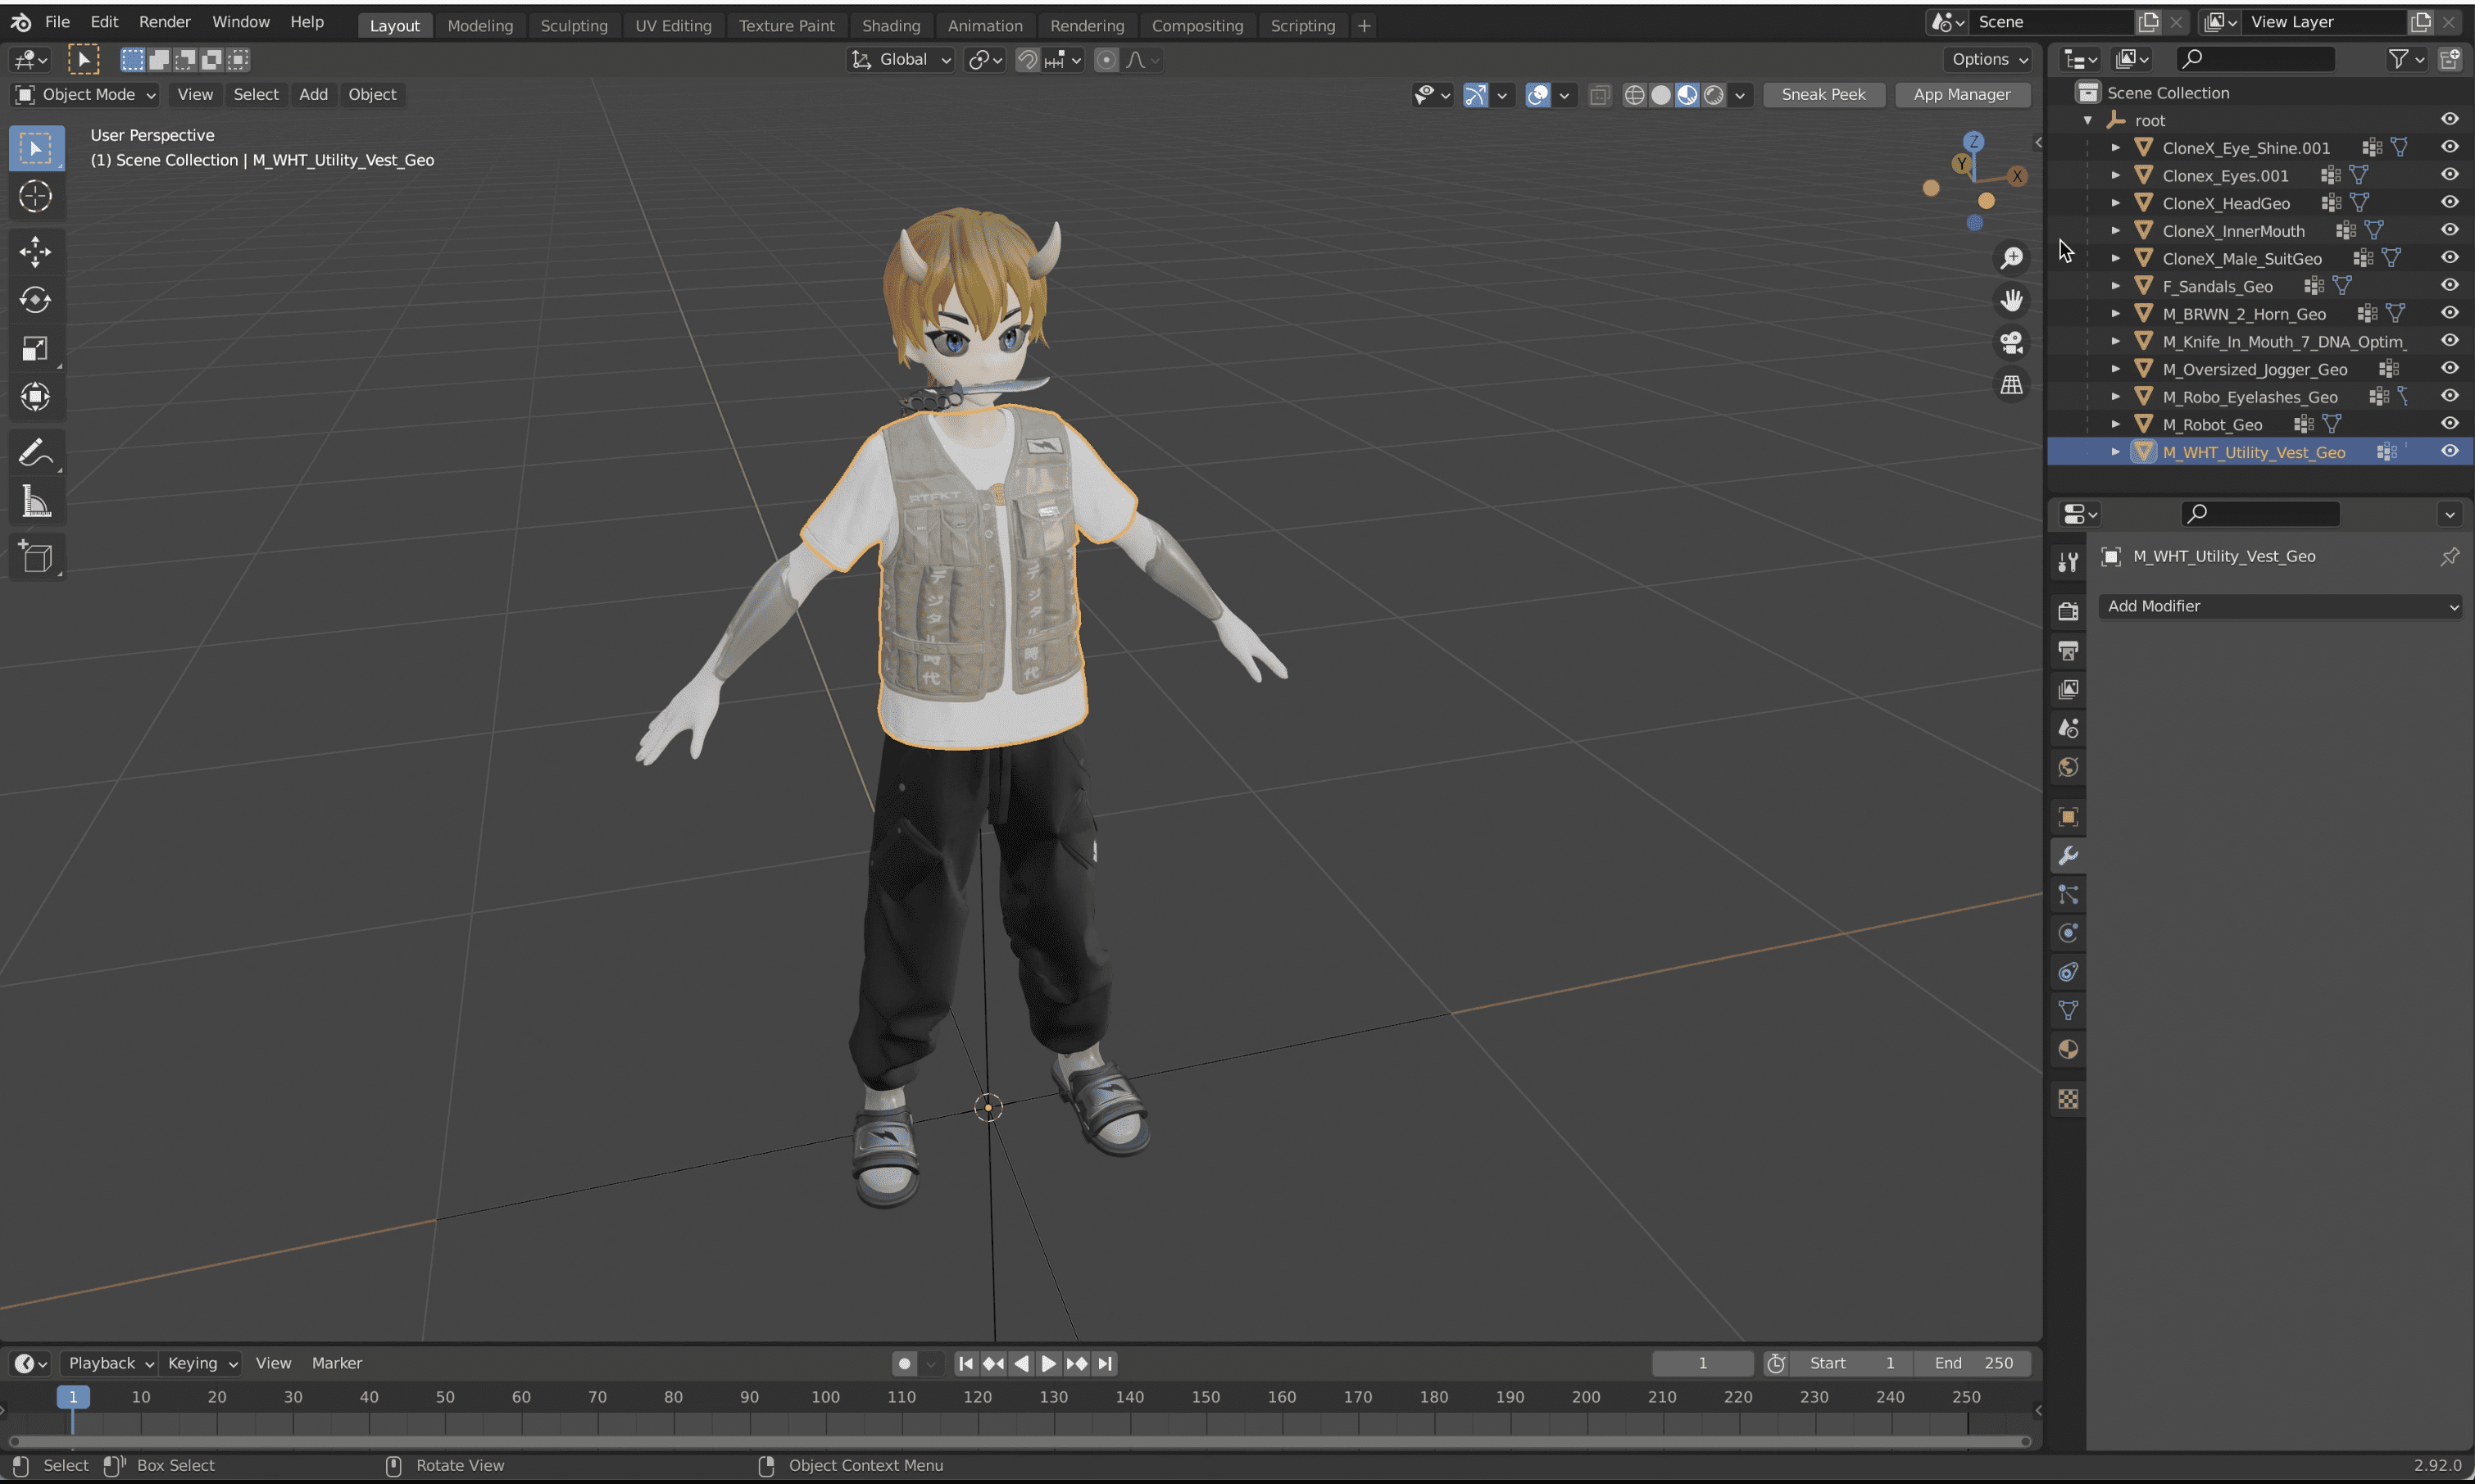
Blender -> new project -> import .gltf
Don’t forget to save the Blender file.

- Before Rigging: 0:07:50
go to lab.geenee….doc >model > automatic
https://lab.geen.ee/engeenee-doc/modules/_geenee_engeenee_doc.models.body.automatic.html
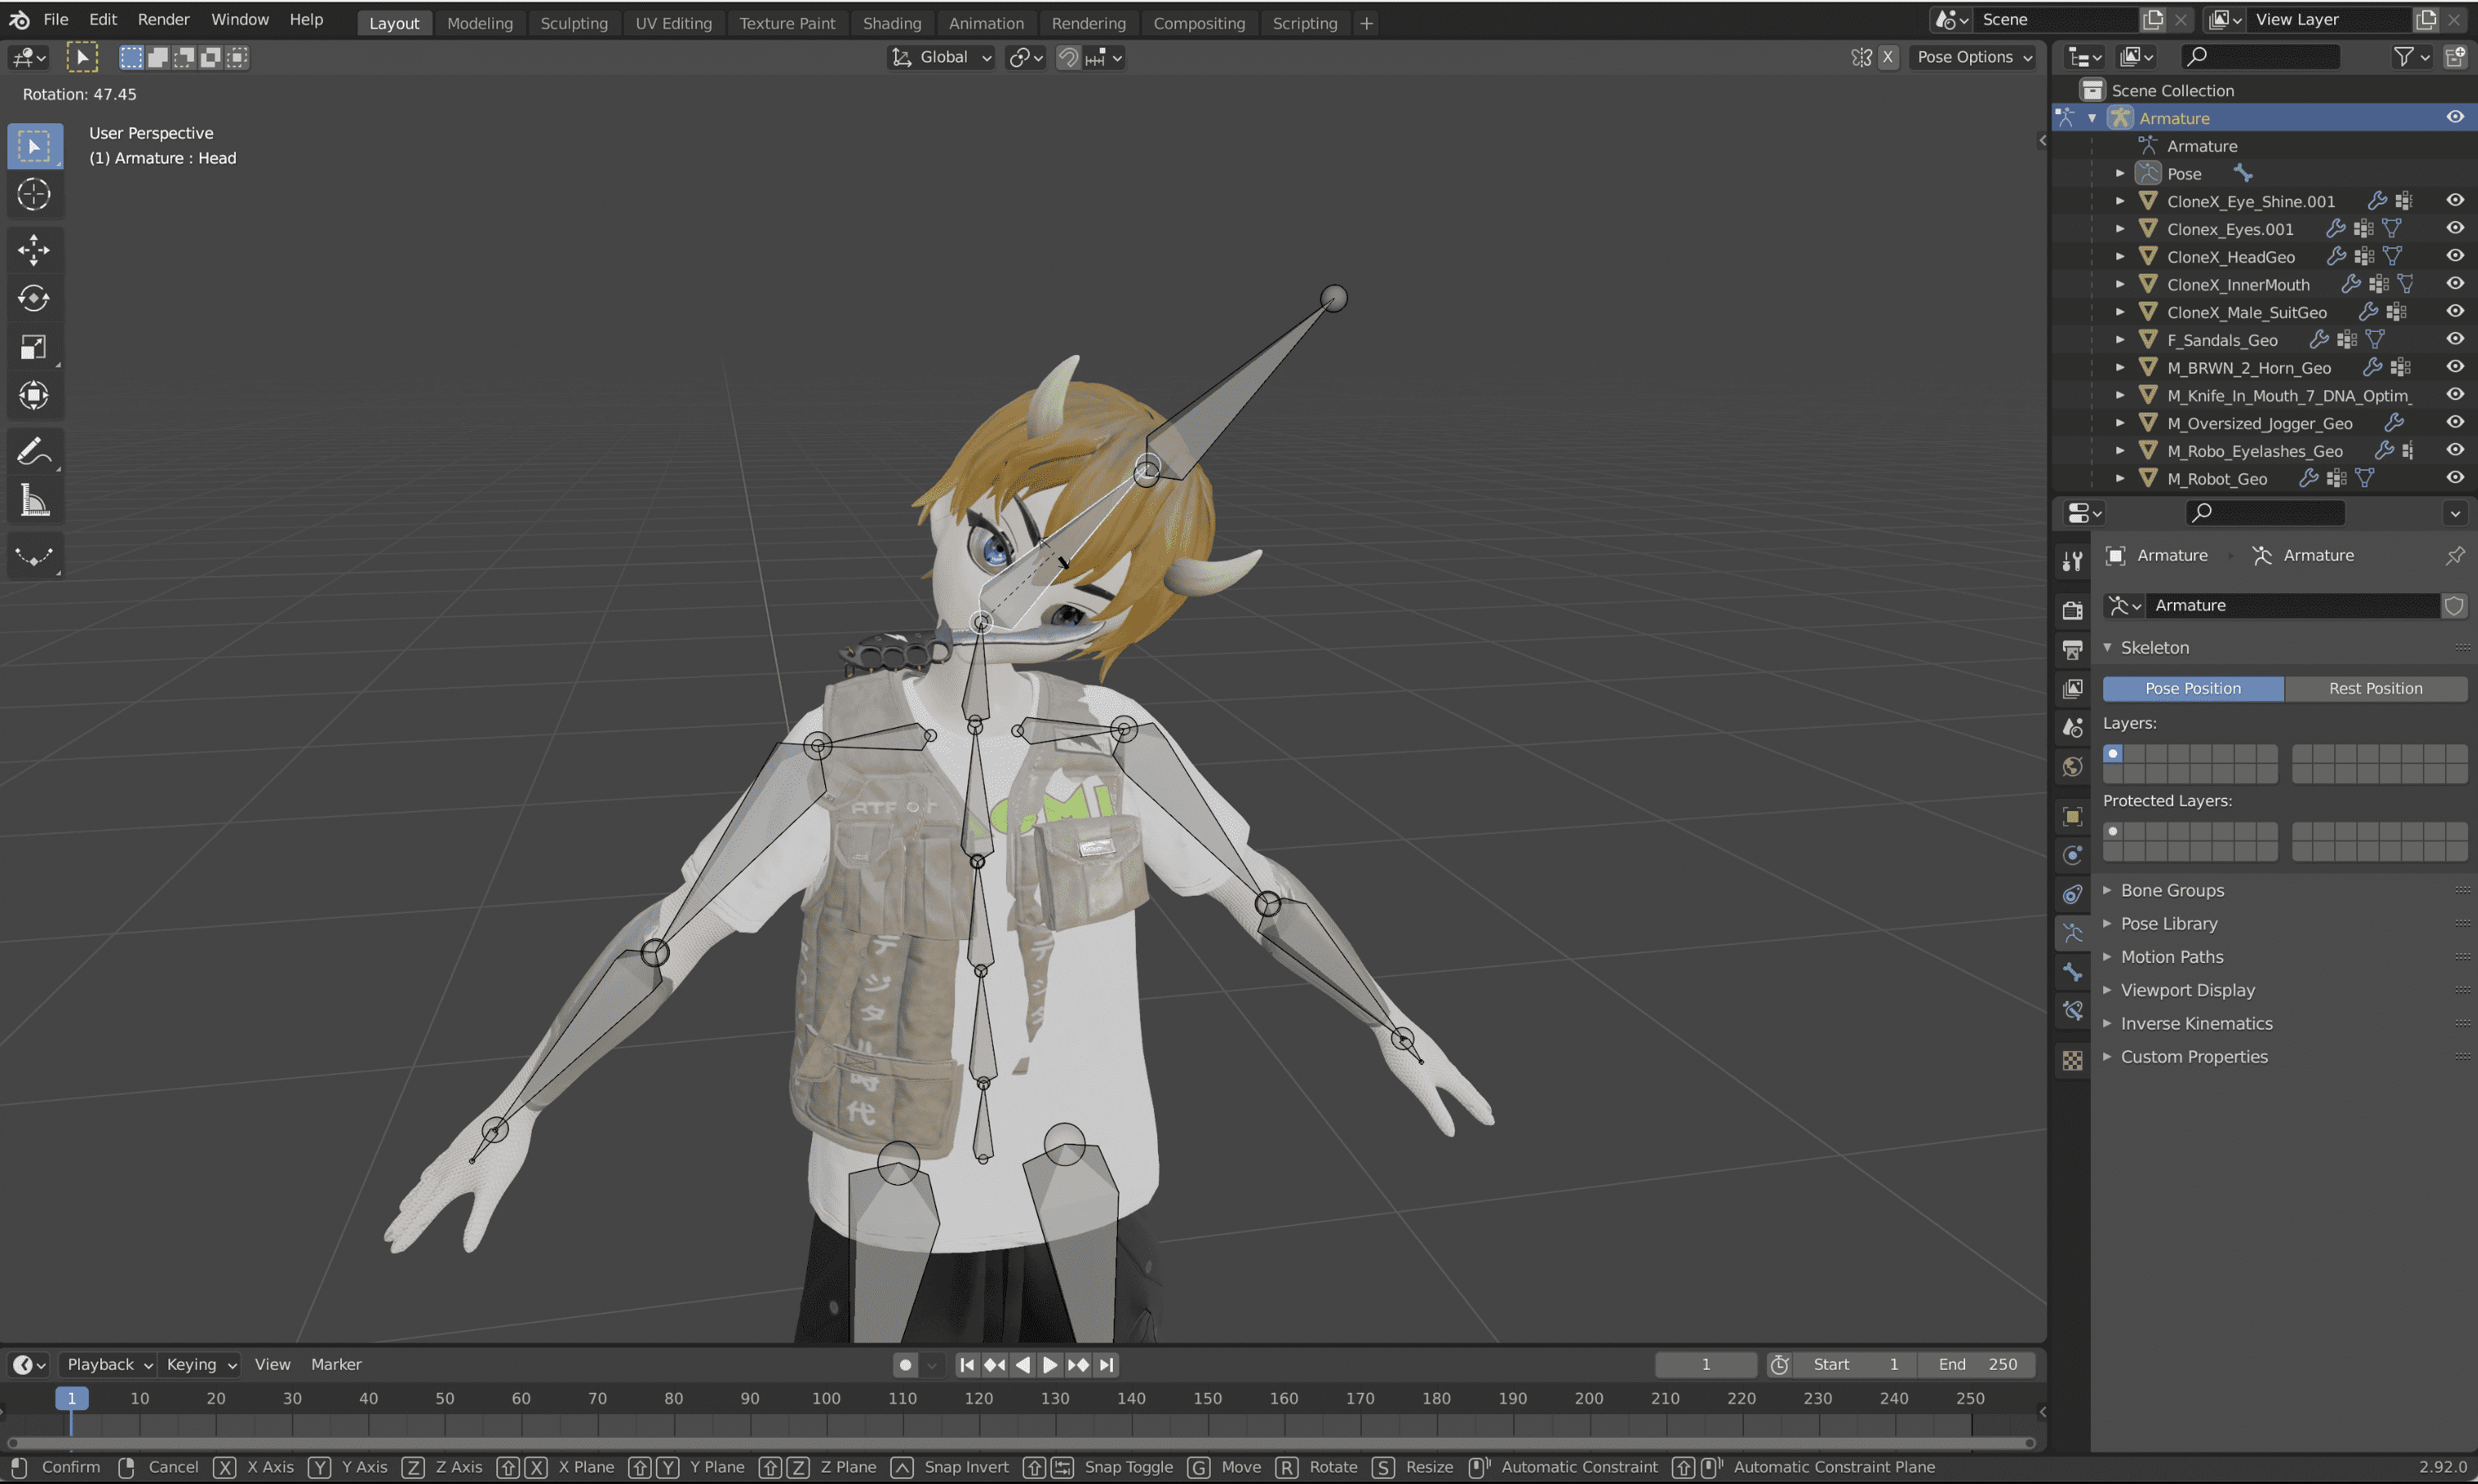
Download Body A pose template glb 0:08:30
Adjust template body template armature to fit your avatar in a Pose Mode
- Apply Transforms and Apply Pose As a Rest Pose and 0:11:18
Apply the transform (Edit Mode -> Select All (A) -> Mesh -> Apply (cmd+A) -> All Transforms )
Apply as a rest pose (Select Armature -> Pose Mode -> select all bones (A) -> Cmd + A -> Apply Pose as a rest pose.
- Geometry optimisation: 0:11:56
Merge by Distance
Select mesh -> Edit Mode -> Mesh -> Clean Up -> Merge By distance. Tip: F3 -> search “Merge By Distance” -> press Enter
Normals -> Recalculate Outside 0:12:33
Mesh -> Normals -> Recalculate Outside (Shift + N)
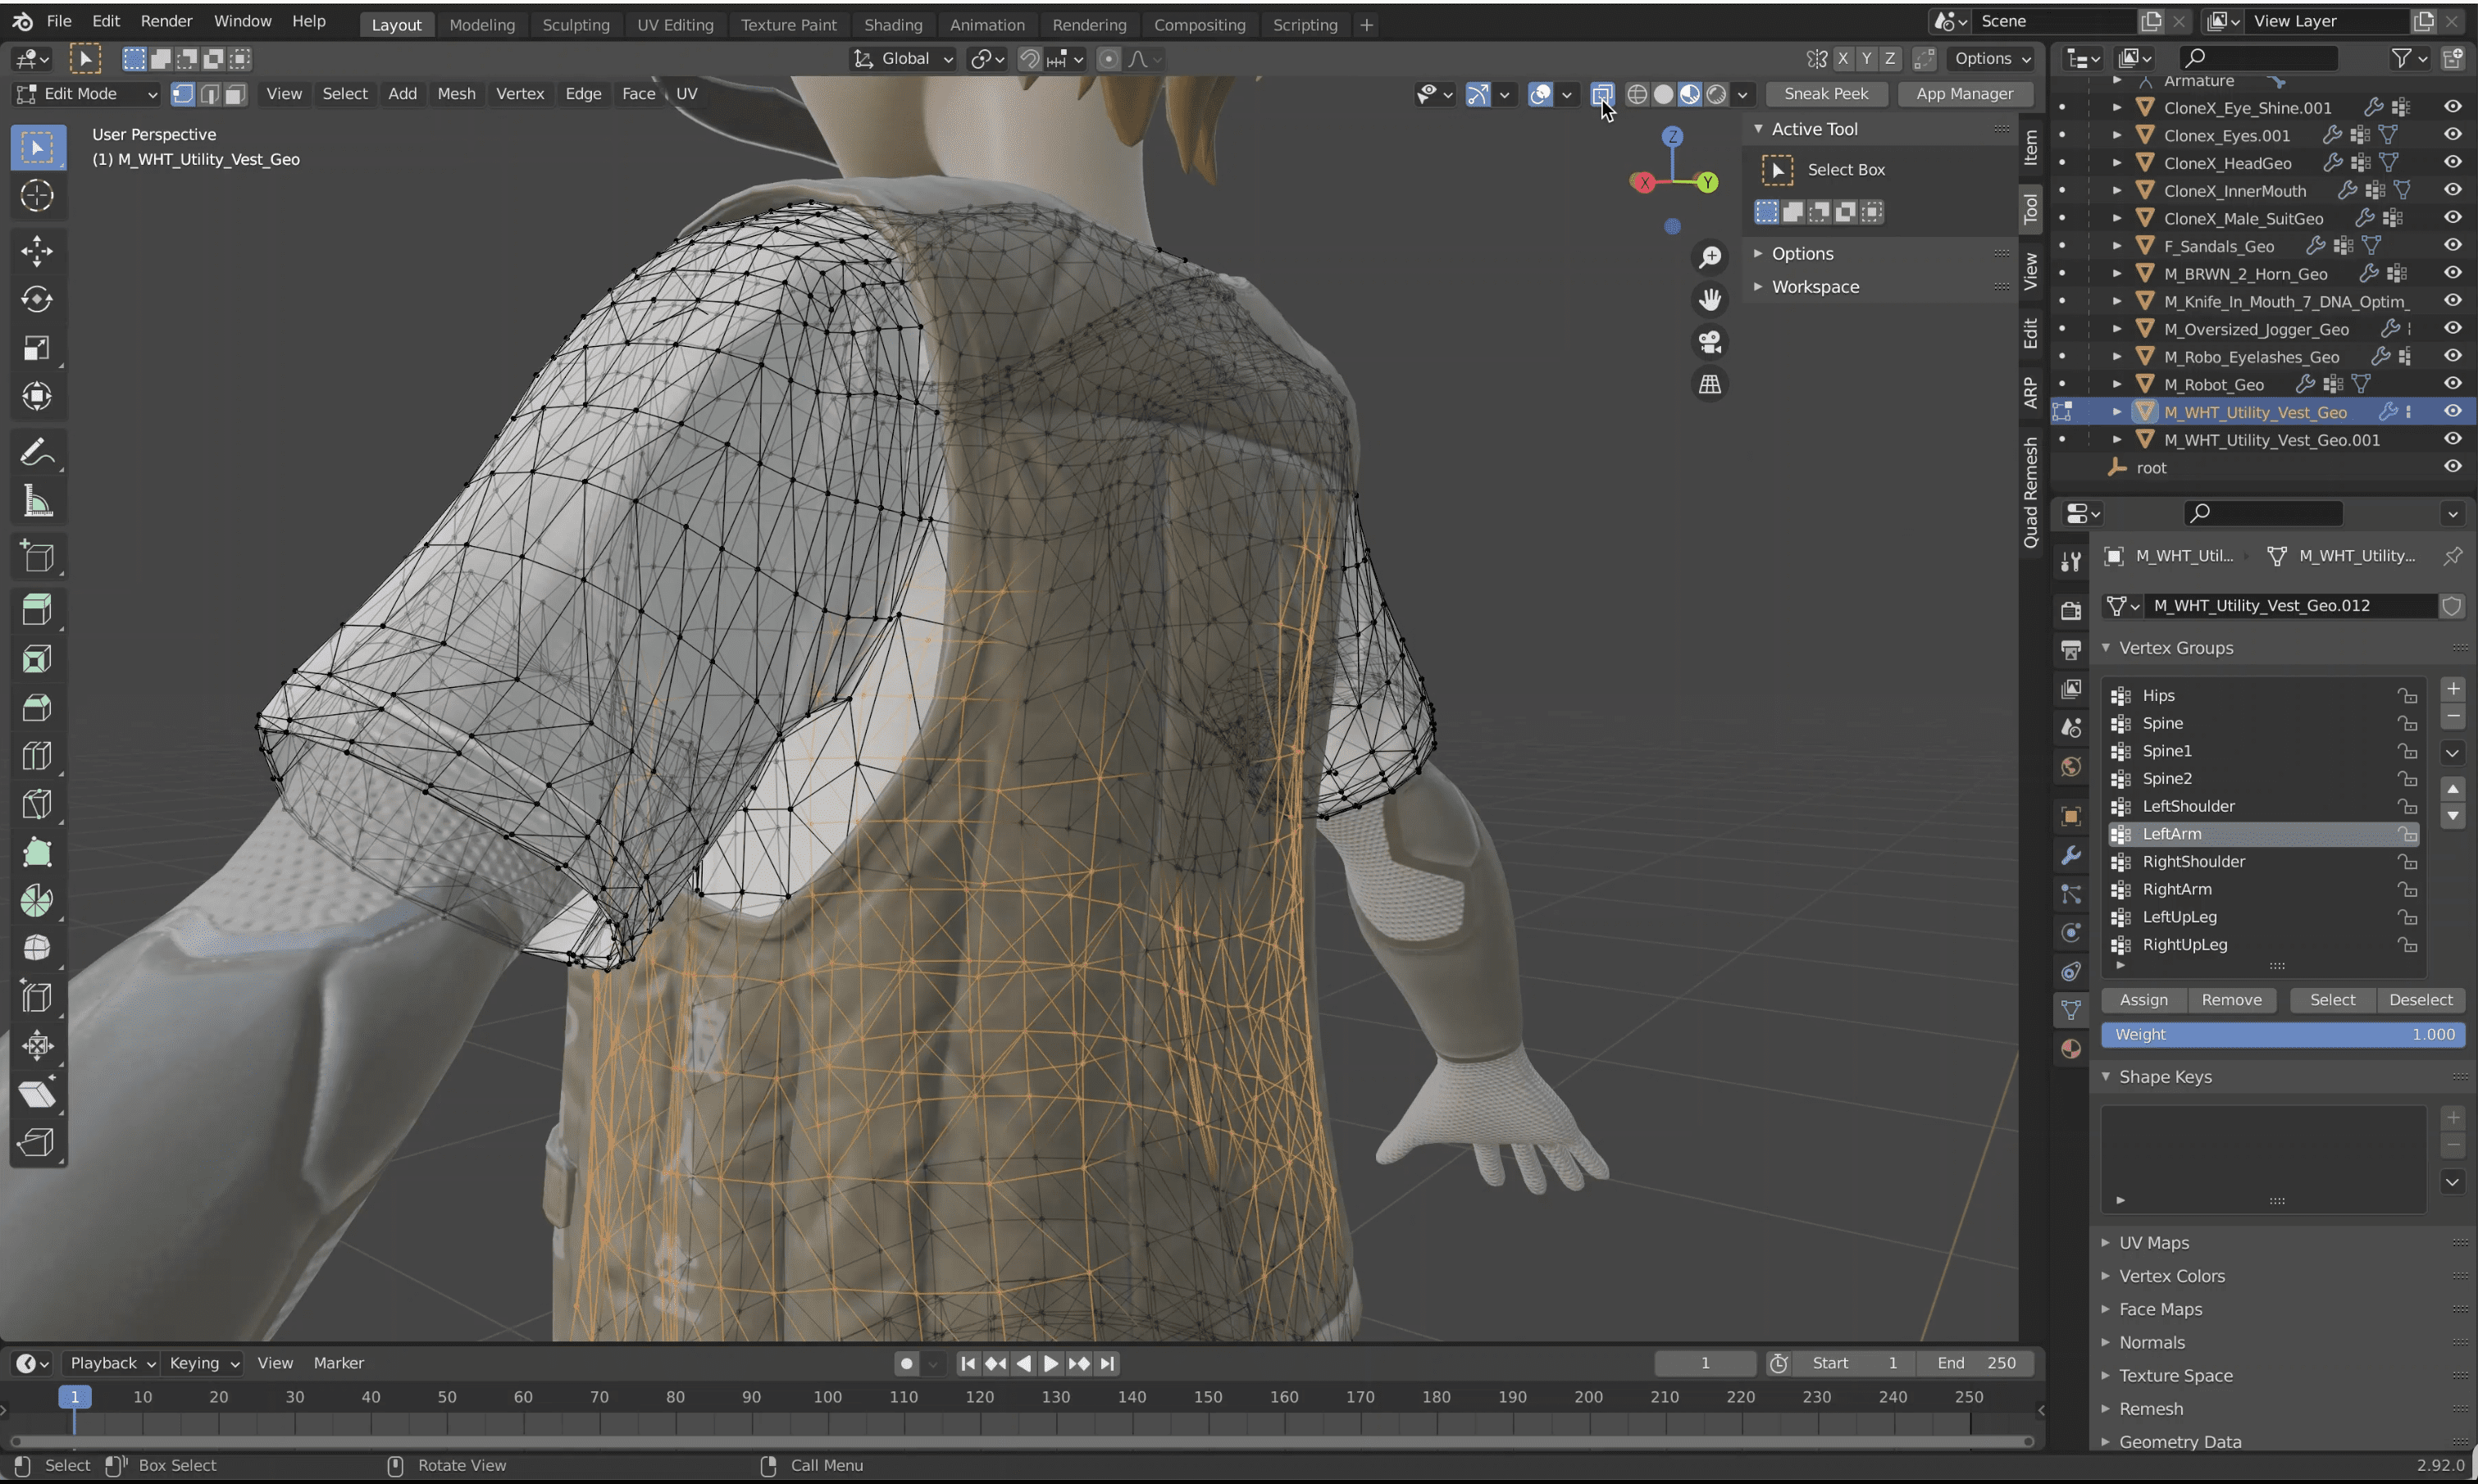
- Rigging (Automatic Weight): 0:13:05
Select all meshes -> cmd + LMB on armature -> Object -> Parent (Cmd+P) -> With Automatic Weight
Skin Test 0:14:10
Remove unused vertex groups 0:14:57
Attach vertexes to the specific bone. 0:15:30
Skin Test Again
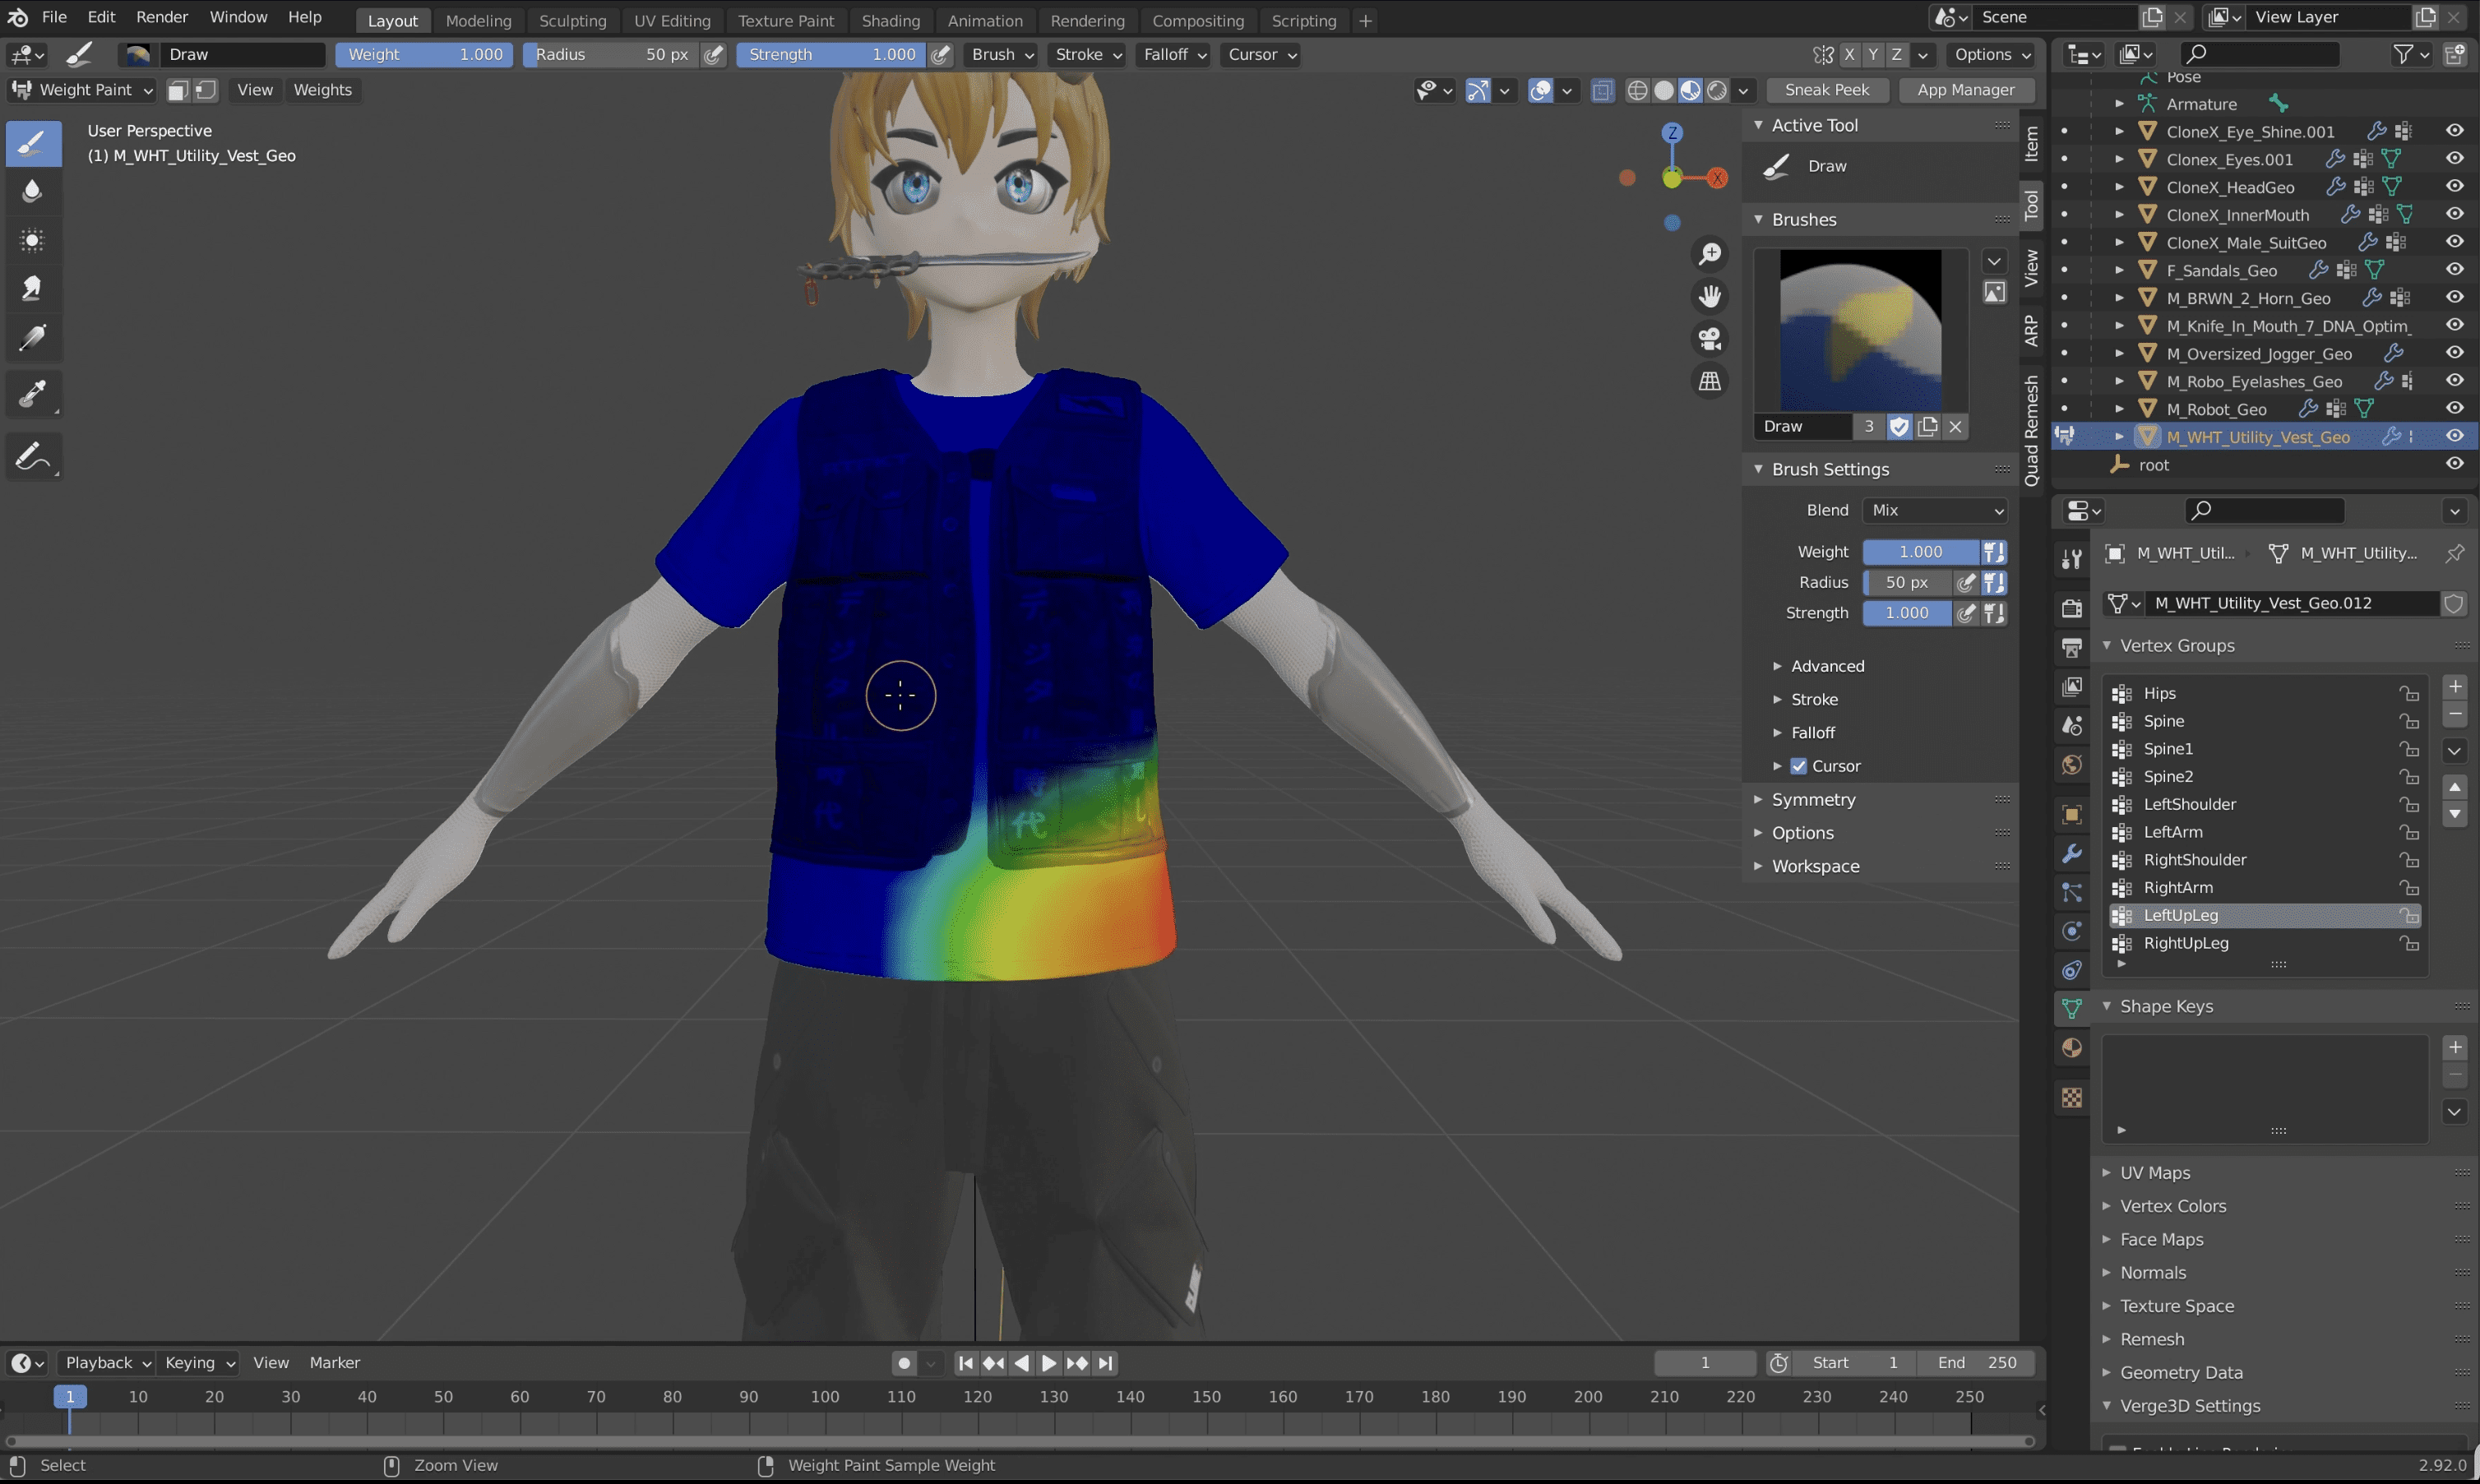
- Custom Weight Painting Tool 0:17:20
- Skinning with Envelop Weight for complex Mesh 0:19:08
Setup Bone Envelop Size (Select Armature -> Edit Model -> Pose Properties Tab -> Viewport Display -> Display As Envelop) 0:20:36
Rescale Bone Envelop (macOS: Cmd + Option + S). 0:21:45
Cleanup mesh from unuseful vertex group dependencies. 0:22:55
- Custom Weight Paint 0:23:32
- Remove mesh parts that will not be visible in the AR scene. 0:24:40
Select the mesh, go to Edit Mode, then select vertexes you want to remove and delete them (shortcut “X”).
Optional: Sometimes it’s very handy to clean up meshes separately. So in Edit Mode you can separate Mesh by material, by loose parts, or vice versa joining a few meshes into one.
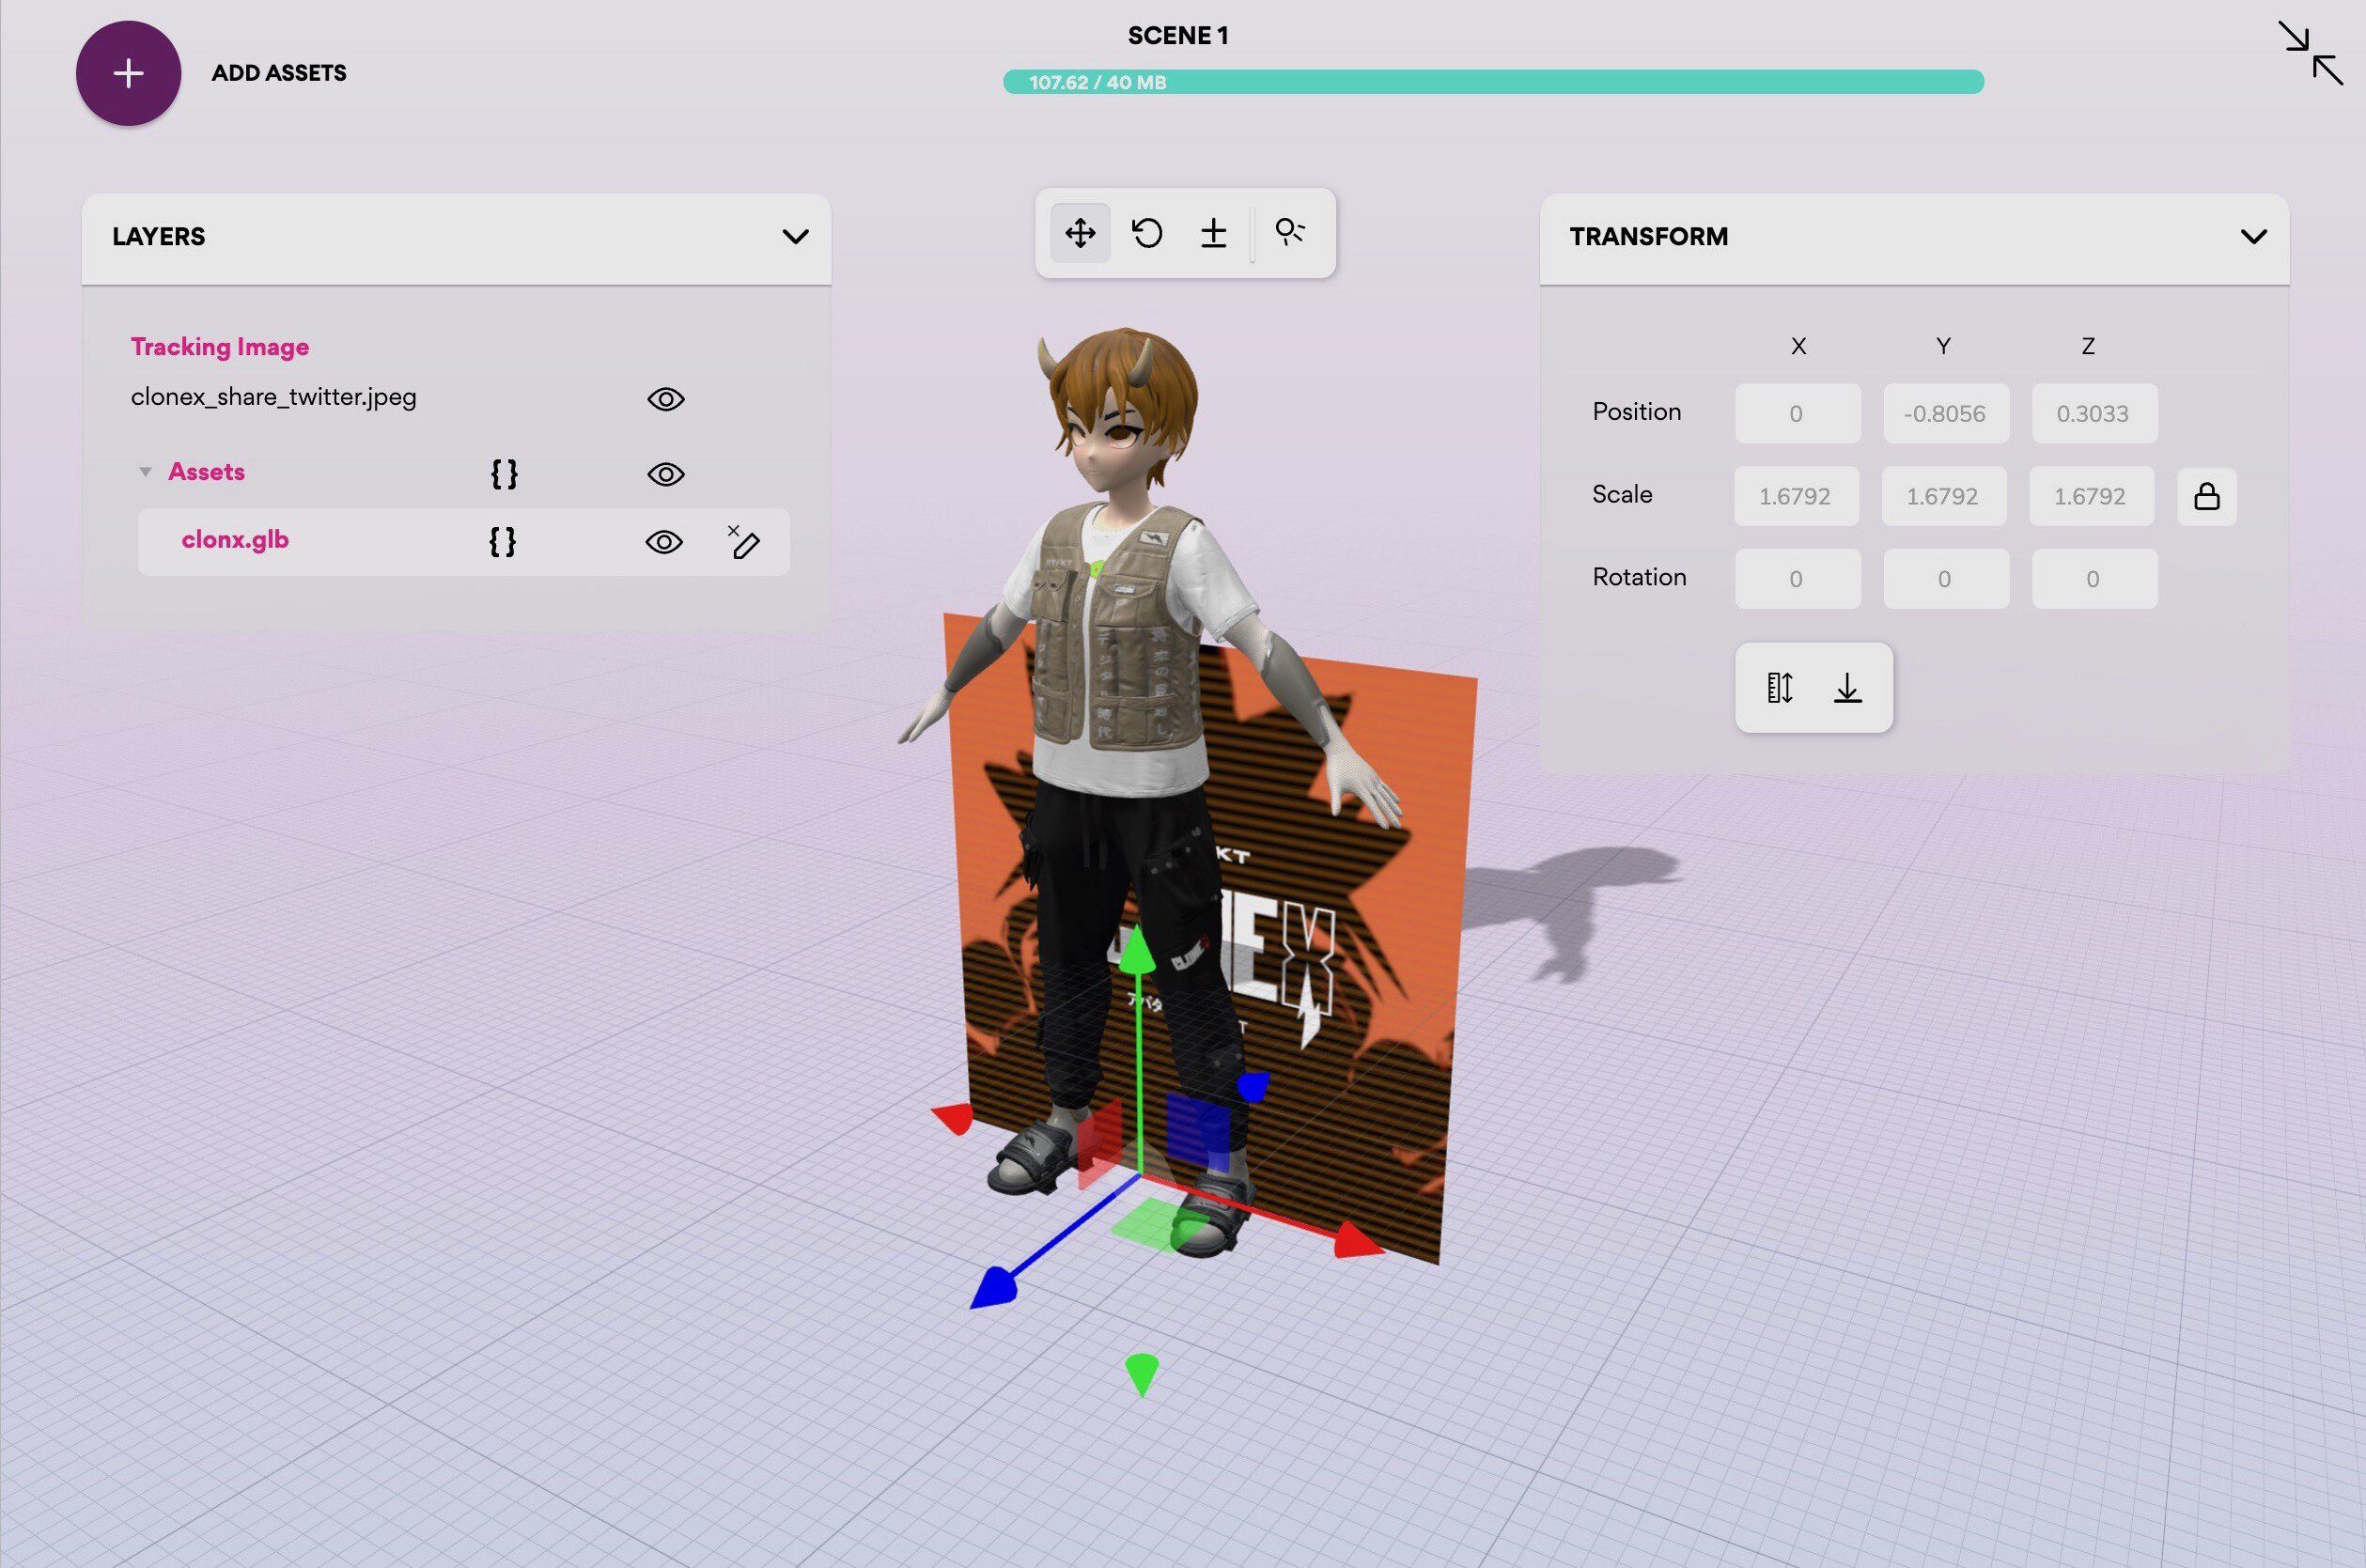
- Export to .glb and Test the model in Geenee Body Tracking Web App https://lab.geen.ee/body-tracking 0:26:05
Drag&Drop to the viewport.
Thanks for watching!!
Have a 3D avatar project that belongs in the Geenee WebAR metaverse? Get in touch today to request access to our full-body tracking SDK.