As fashion month ramps up around the globe, it is also ramping up in the digital space. With all the Metaverse buzz lately, an increasing number of designers and brands are considering the virtual dimension of fashion – and it’s amazing to see a variety of immersive experiences pop up along the way.
At Geenee one of our core missions is to serve as an AR Metaverse tool for Creators, allowing anyone to build, publish and share an AR experience with ease. This extends to fashion. We want to empower our users to create the AR wardrobe of their dreams and allow them to wear it and share it with others. And as the only WebAR technology platform to offer full-body tracking for the browser, there’s no one else in a better position to do so.
With that in mind, this post outlines a simple tutorial using a Tilt Brush -> Sketchfab -> Blender -> Geenee WebAR pipeline to easily create and wear your own digital dress in augmented reality.
Follow along below – and if you do, we’d love to see what you create!
Step 1: Create your garment
From easiest to challenging, you can find or create a 3D garment by either finding it on Sketchfab, creating it in VR via Tilt Brush or Gravity Sketch or building from scratch with a desktop tool like Blender or Marvelous Designer. For more tips and tricks check out our guide to creating your files here.
Sketchfab
We downloaded the model (link) and opened it in Adobe Dimension to quickly replace the main texture file with a free fine silk material and adjusted the color for our liking.
VR 3D Programs
In both Tilt Brush and Gravity Sketch, you can choose a female body form which you can draw over and follow its shape to create a hand-drawn garment very easily. In about 20 minutes we created 8 dresses, all that you can find here.
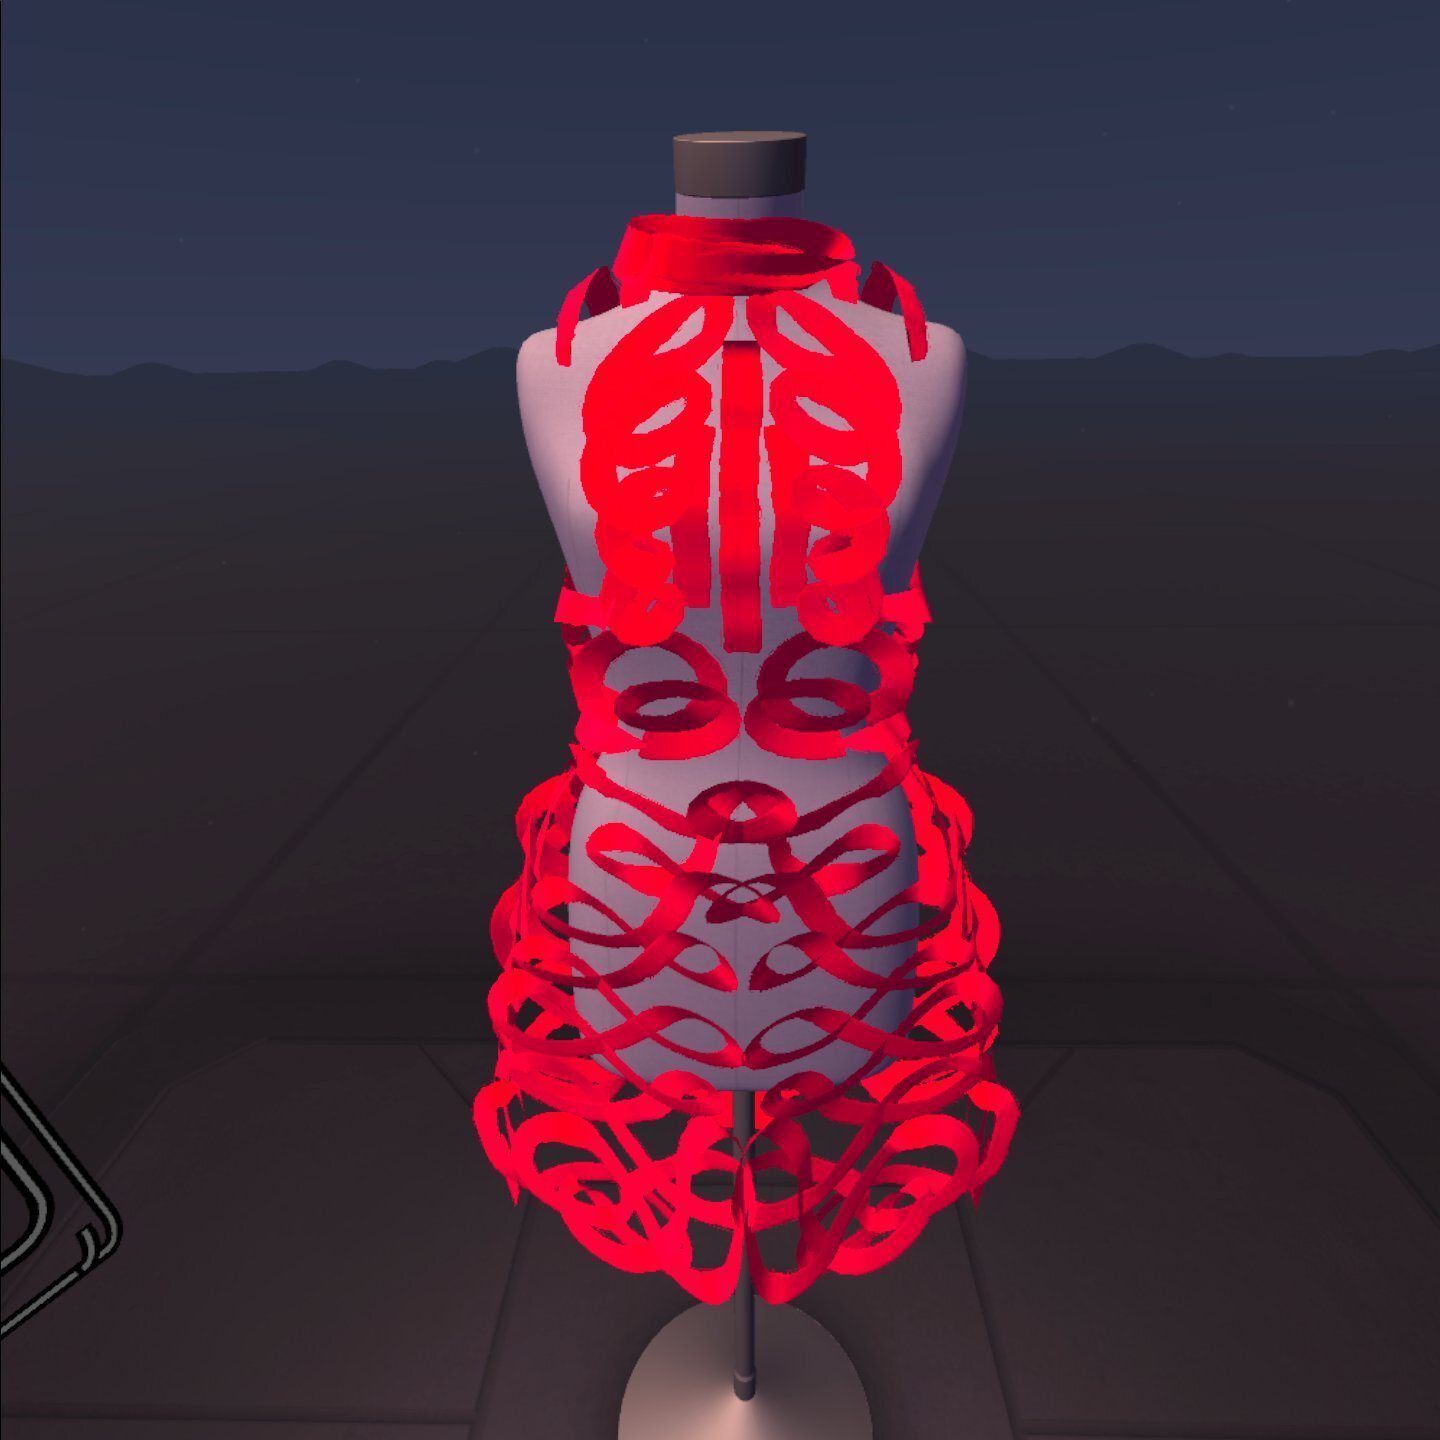
Tilt Brush
Step 2: Rig your garment
Bring your garment into Blender to rig. Follow the steps here.
A couple useful tips to remember:
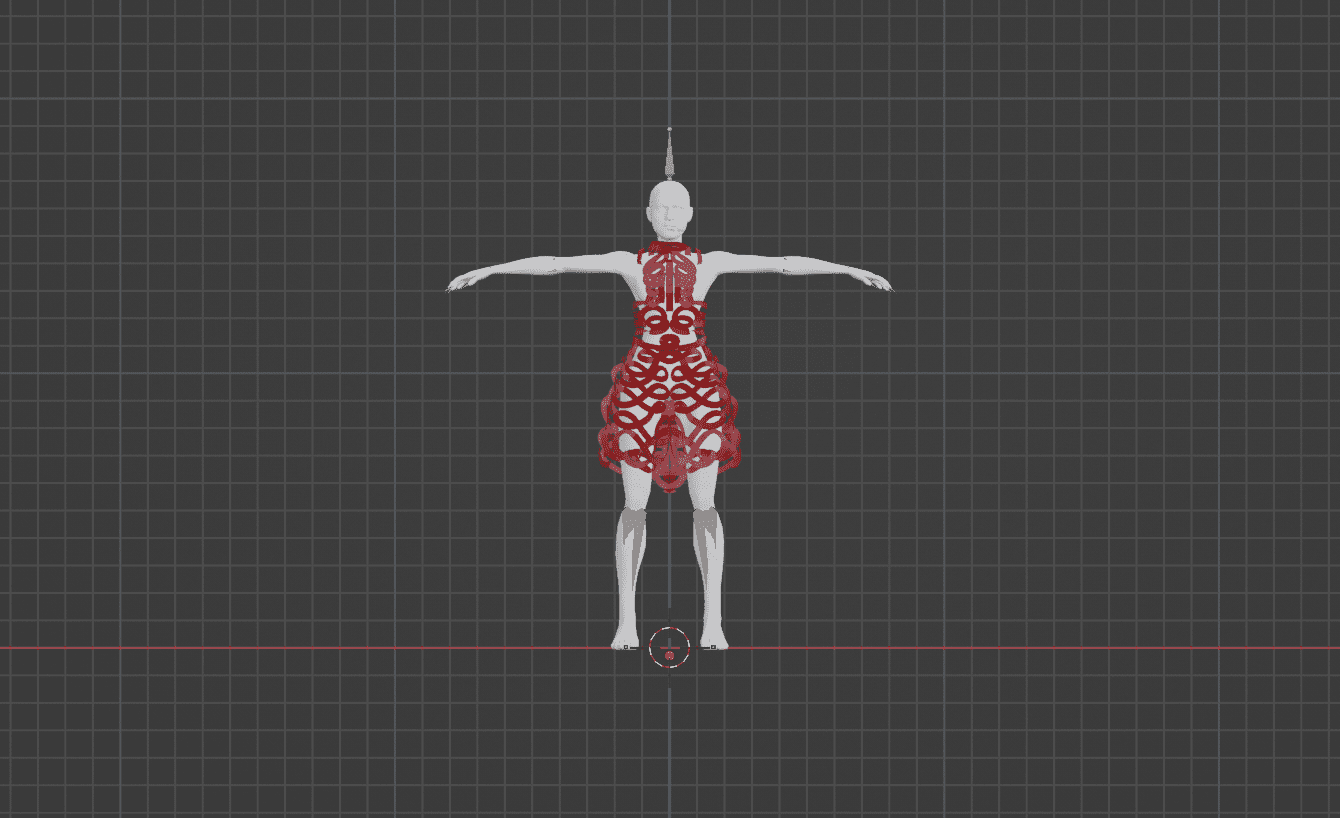
1 – Nest the body occluder inside the dress, inside the same armature so that the dress fits the body perfectly.
2 – Make sure the hip bones are rotated like attached
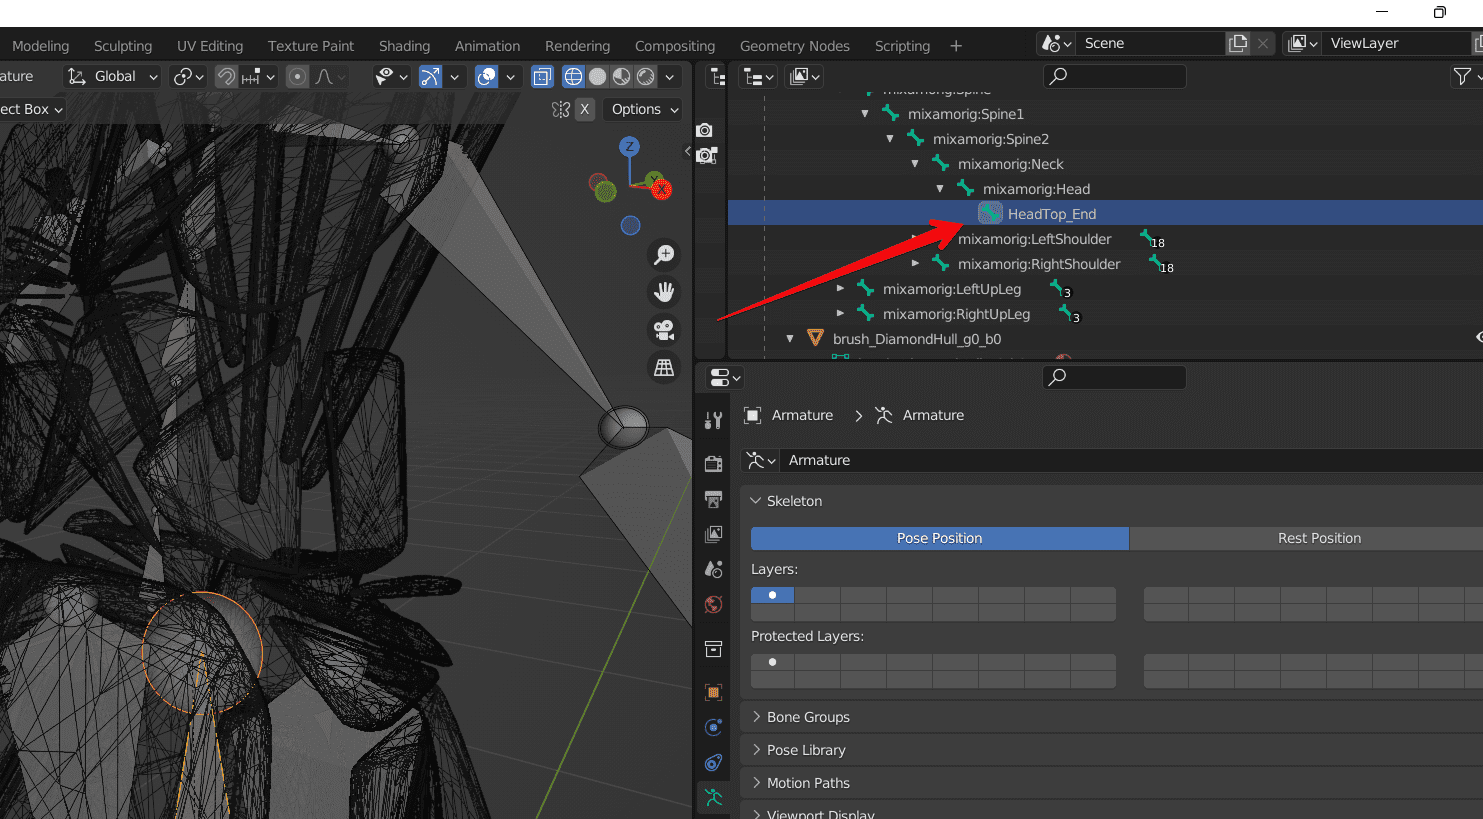
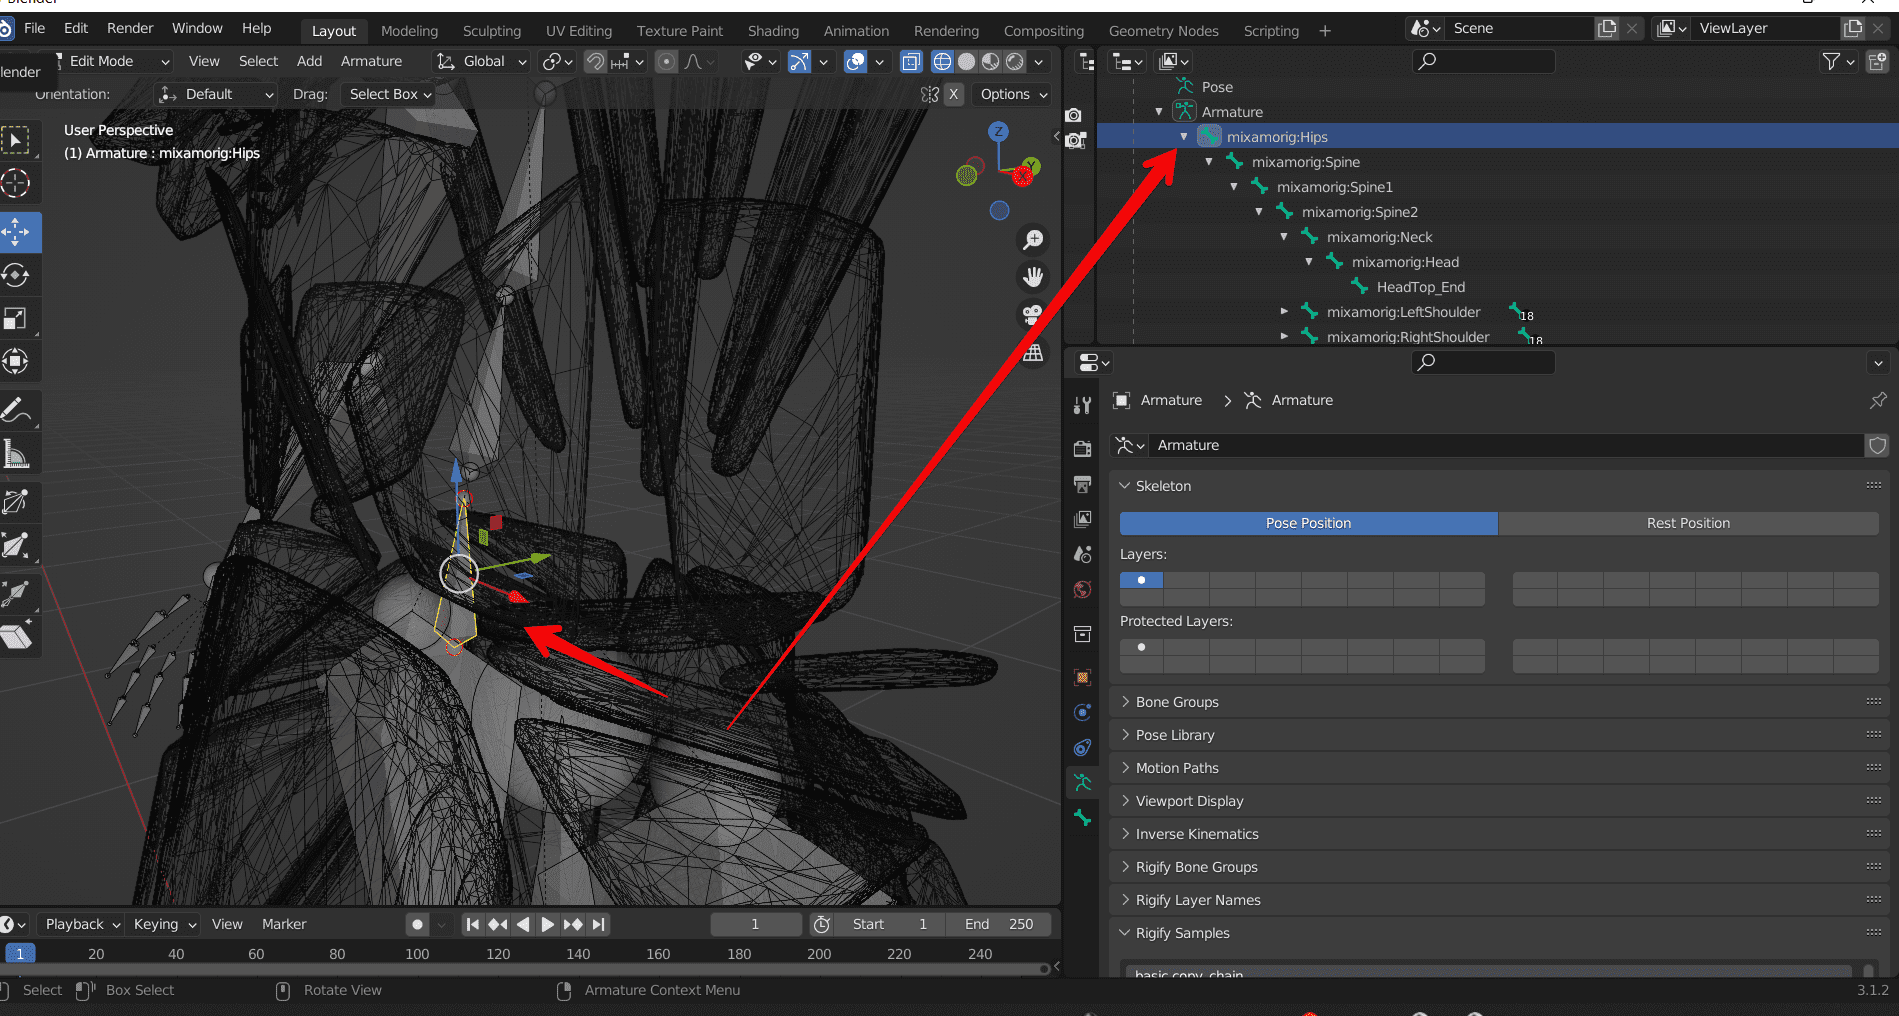 3 – The HeadTop_End bone should be added as a child of Head but without any weights for the garment.
 4 – Export as .glb
Here is the most advanced technical documentation for Face/Body Tracking Model preparation in Blender.
Step 3: Prep to wear your digital garment
- After you export your .glb file from Blender, save them at cloud storage (remote file hosting), for example Dropbox.
- To try on your digital garment you can use Geenee Body Tracking Demo App.
Here you can find How to use Body Tracking universal app parameters. - With this Demo App you can try-on your digital garment using desktop or mobile camera, also you can use default video or upload a custom video to use it instead of camera. If you want to use video instead of camera mark checkbox.
- Paste URL with model to Model URL section, change “www” to “dl” in URL.
For example, https://dl.dropbox.com/s/eyah7qiff1r99xc/Dress%203.glb - If you have an occluder in 3D model, insert the corresponding mesh name to the occluder section.
- Press “Open”.
To create your next project using the Geenee AR full-body tracking SDK, sign up here and start building today!